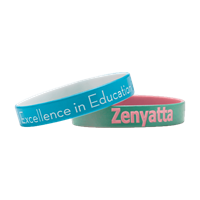
How to Make Rubber Bracelets
We take great pride in streamlining the process of creating amazing, personalized rubber bracelets. So, whether you are trying to promote a brand or business, raise money for a good cause, commemorate an experience or loved one, or create something unique and special to you, we have you covered. Our bands are made from the highest-quality silicone, which means when you order bracelets from Wristband Resources™, you can expect both durability and quality. This article will discuss how to make rubber bracelets in just a few easy steps.

Step One: Choose Your Rubber Bracelet Style
We offer multiple styles of rubber bracelets, which offers additional flexibility and customization options. There are five different styles bracelet that you can choose from. They are as follows: embossed, debossed, imprinted, ink-injected, and color-coated.
Embossed
Embossed bracelets add a three-dimensional aspect to your design by raising your text and graphics from the surface of your band. With the touch of your finger, you will feel your design.
Debossed
Debossed bracelets are different from embossed ones. Instead of raising the text from then surface of the band, the design is engraved into the band with a laser engraver. It is also important to note that debossed bracelets have the longest lifespan.
Imprinted
Imprinted bracelets are our most popular style. To create these, we print your graphics and text to the surface of the band using wear-resistant ink. This allows you to achieve the most design detail of any style.
Ink-Injected
To create ink-injected bracelets, we begin by debossing your bracelet before filling your engraving with high-quality ink. This ink helps protect your bracelet from wear and tear.
Color-Coated
These two-toned bracelets are first debossed before being filled with ink matching the interior of the band. This creates a striking contrast that amplifies your text.

Step Two: Choose Your Band Size
Our ½ inch band width is easily our most popular, but if you require a bigger design, you are going to need a bigger band. We offer sizes ranging from ¼ inch to 2 inches.
Step Three: Choose Colors and Quantities
We offer a wide variety of colors that you can choose from. We also have segmented and swirled colors, and even bands that glow in the dark. Do a rough estimate of how many of each color you will need in both adult and youth sizes and enter the quantities in the corresponding boxes. You can also click See All Colors for a wider selection.
Step Four: Add Text
Before you begin adding text, choose an imprint (text) color if applicable. You can also adjust your font and text size. We allow you to add up to 30 characters of text on both the front and back of your band. Be sure to spellcheck before moving on. Our machines are horrible at spelling and will simply create what you give them.
Step Five: Add Graphics
You can add up to four graphics to your band. To add graphics, click Change. From here you can choose from any of our free clipart, or upload your own graphics. The choice is entirely yours!
You Did It!
Congrats, you just designed your first rubber bracelet! All you need to do now is choose any add-ons that might be of interest and choose your shipping method.
If you have any additional questions or require support, please give us a call at 888-373-0816. You can also begin a live chat with a representative by clicking the chat feature at the bottom of your screen.